Inside the Android Build Process
The Android application build process is performed in two steps:
- Application package (.apk file) is generated with all the required libraries and serialized assets.
- Application package is deployed on the actual device.
When “Build” is selected in the “Build settings” dialog only the first step is accomplished. Hitting “Build and Run” performs both steps. Typing Cmd+B invokes the automatic build and run process, and the latest used file is assumed as the build target.
When you first try to build an Android project, you will be asked the location of the Android SDK. that is required to build and install your Android application on the device. You can change this setting later in Preferences.

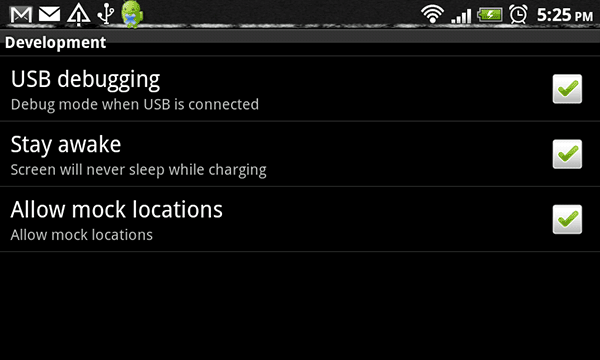
When you build your app to the Android, be sure that the device has the “USB Debugging” and the “Allow mock locations” checkboxes checked in the device settings.
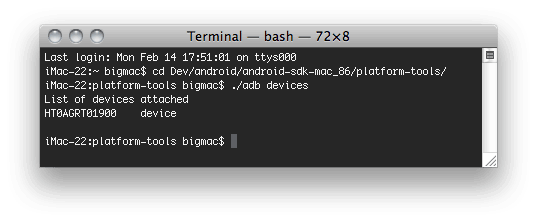
Run the adb devices command found in your Android SDK/platform-tools folder, so that the operating system can see your device. This should work both for Mac and Windows.
Unity builds an application archive (.apk file) for you and installs it on the connected device. In some cases your application cannot autostart (for example on iPhone), so you need to unlock the screen, and in some rare cases find the newly installed application in the menu.
Texture Compression
Under Build Settings you’ll also find the Texture Compression option. By default, Unity uses ETC1/RGBA16 texture format for textures that don’t have individual texture format overrides (see Texture 2D / Per-Platform Overrides).
If you want to build an application archive (.apk file) targeting a specific hardware architecture, you can use the Texture Compression option to override this default behavior. Any texture that is set to not be compressed will be left alone; only textures using a compressed texture format will use the format selected in the Texture Compression option.
To make sure the application is only deployed on devices which support the selected texture compression, Unity will edit the AndroidManifest to include tags matching the particular format selected. This will enable the Android Market filtering mechanism to only serve the application to devices with the appropriate graphics hardware.
Google Android Project
Generates a project which can be opened by Android Studio. Simply follow the steps:
- Download Android Studio.
- Export the project from Unity with Google Android project checkbox selected.
- Open Android Studio:
- File->Import Project. For ex., if you project was exported to C:\MyProjects, pick C:\MyProjects<Product Name> path.
- Pick Import Destination Folder
- Finish
- If it asks you to reload a project in Language Level Changed dialog, choose yes.
- Note: If you want to debug your application, you must set android:debuggable=“true” in AndroidManifest.xml, don’t forget to set it to false once you’re done.
- Done