Committing changes to a project
When you commit changes to a project, you create a “revision” - a labelled checkpoint in the project’s history. This lets you refer back to the state of the project at a particular point in time and optionally deploy the project at that point.
NOTE: To create a deployable revision, your project must have a deployment command.
After you have completed your data science work and are ready to commit changes:
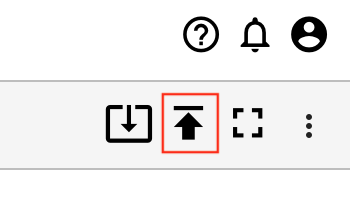
Click the Commit icon in the top right corner (up arrow).
TIP: The Save icon to the far left of the screen saves files locally.
You will see a list of files that have been changed since you last committed. Enter a commit message, and choose whether to commit the revision as a deployment revision.
TIP: If a file doesn’t show up in this list, make sure it is saved locally.
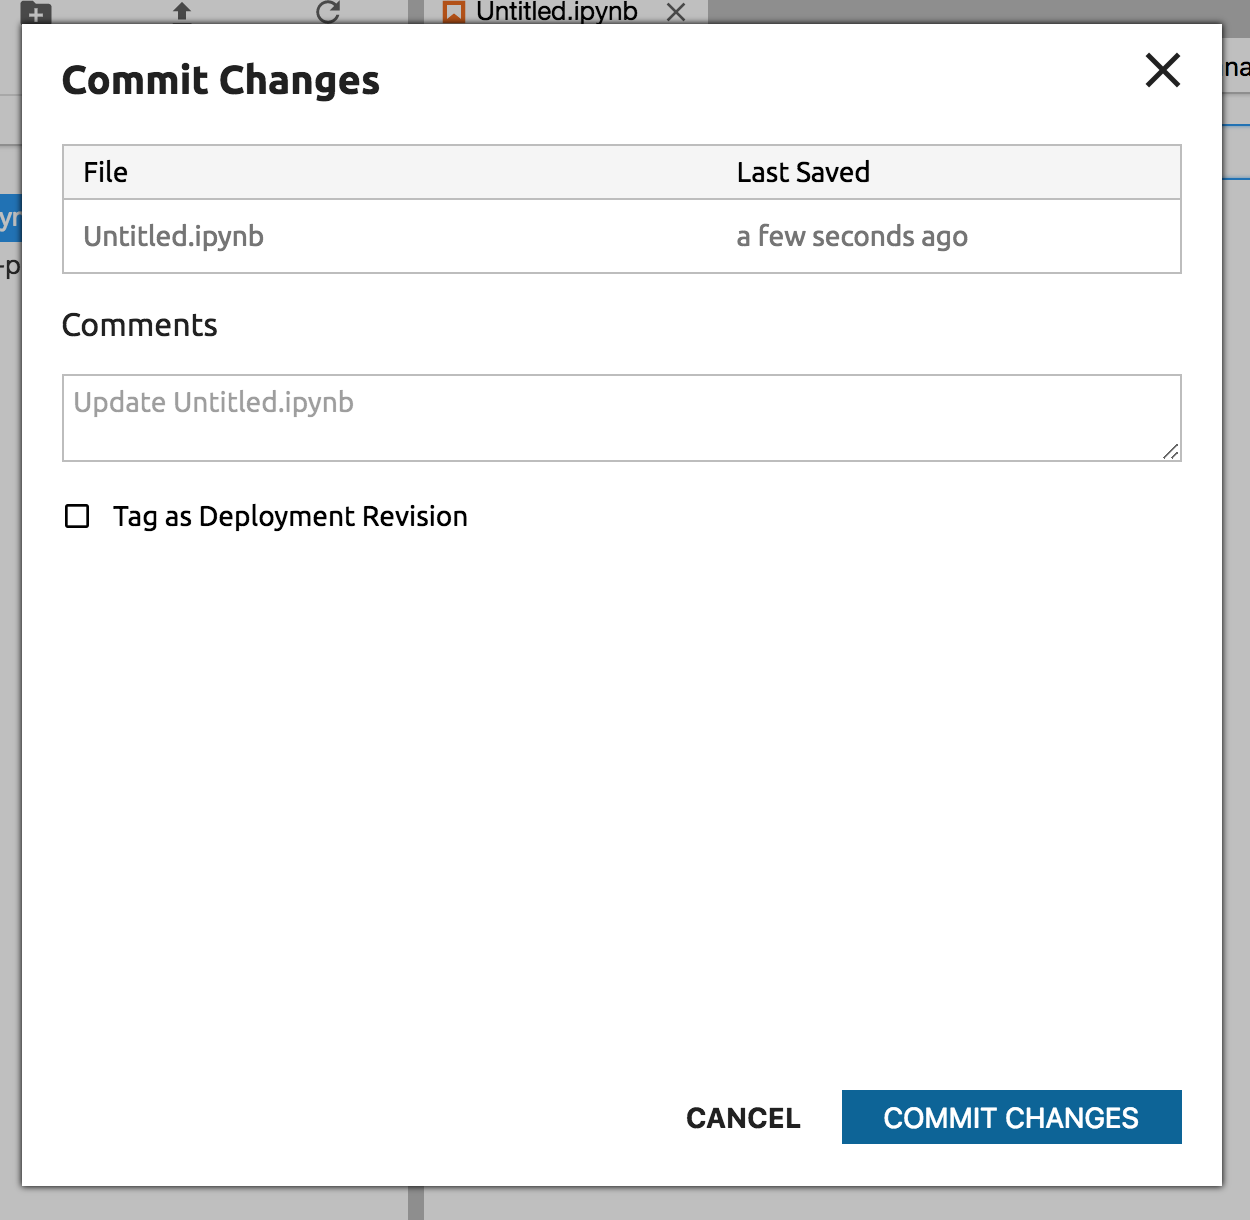
NOTE: Files names containing unicode characters will not be displayed properly in this list and cannot be committed to the server. Please use file names that don’t include these characters.
Click Commit Changes.
NOTE: See working with collaborators for detailed information on how committing works.
If you have elected to create a deployable revision, you might want to deploy your project next.
TIP: When deploying, be sure to select the deployment revision and deployment command that you want from the dropdowns.