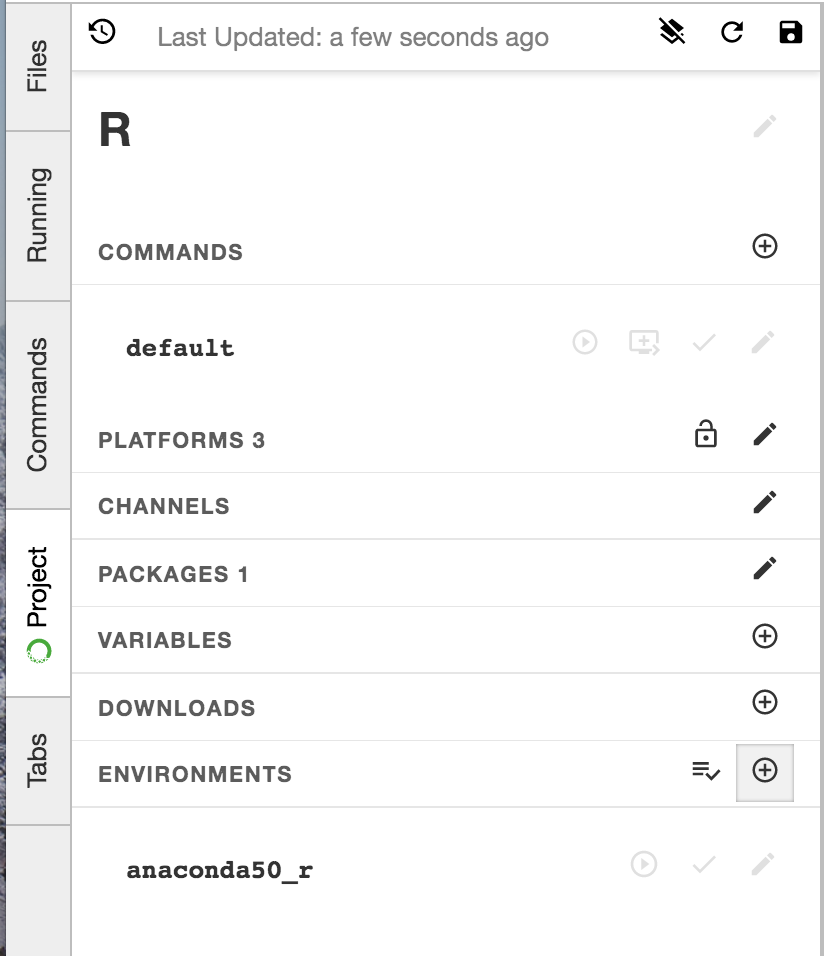
Setting an environment for a project
Add or edit environments from inside an editing session (JupyterLab shown).
On the left tabs, click the Project tab and find the Environments section. You will see the “default” environment listed. You can Prepare all environments (looks like a list with a checkmark) or Add (+) new environments.
Next to each environment there are icons to Run (open a terminal running), Check or Edit (looks like a pencil) the environment.
Creating a new environment
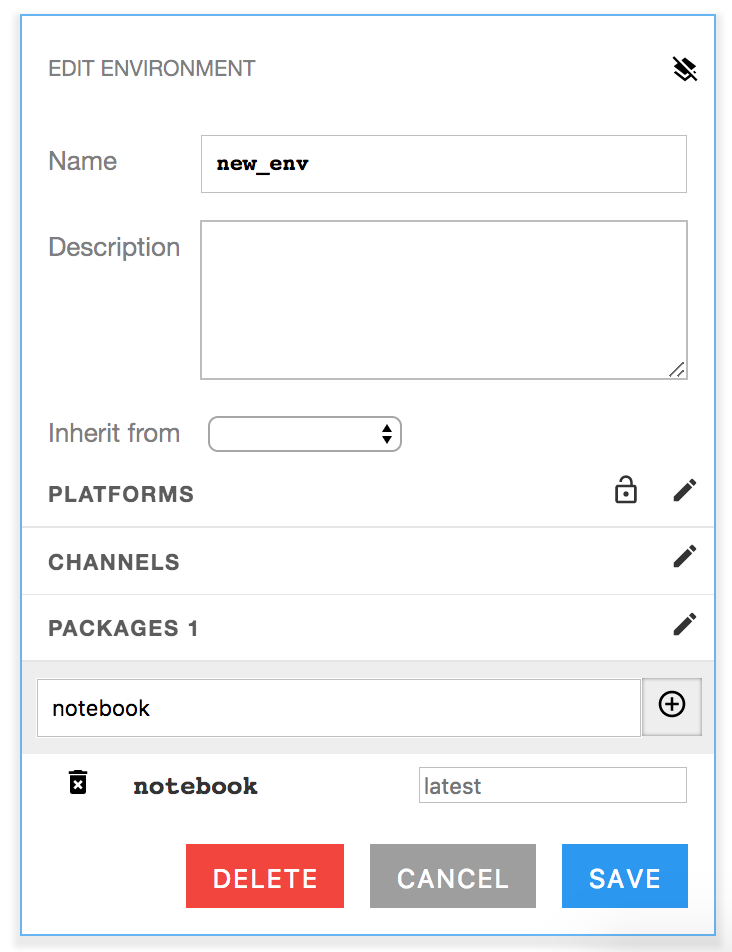
To Create a new environment, click the Add button. This will open a panel that allows you to set the name of the environment and choose whether to inherit from an existing environment.
You can also choose which platforms to support and which channels and packages to include.
In this example, the environment is named “new_env” and has the notebook package included.
- TIP: Be sure to add the
notebookpackage to any environment that you want to use for notebook projects and the
bokehpackage to any environment that you want to use for Bokeh projects.
- TIP: Be sure to add the
Click Save at the bottom of Environment section to save changes.
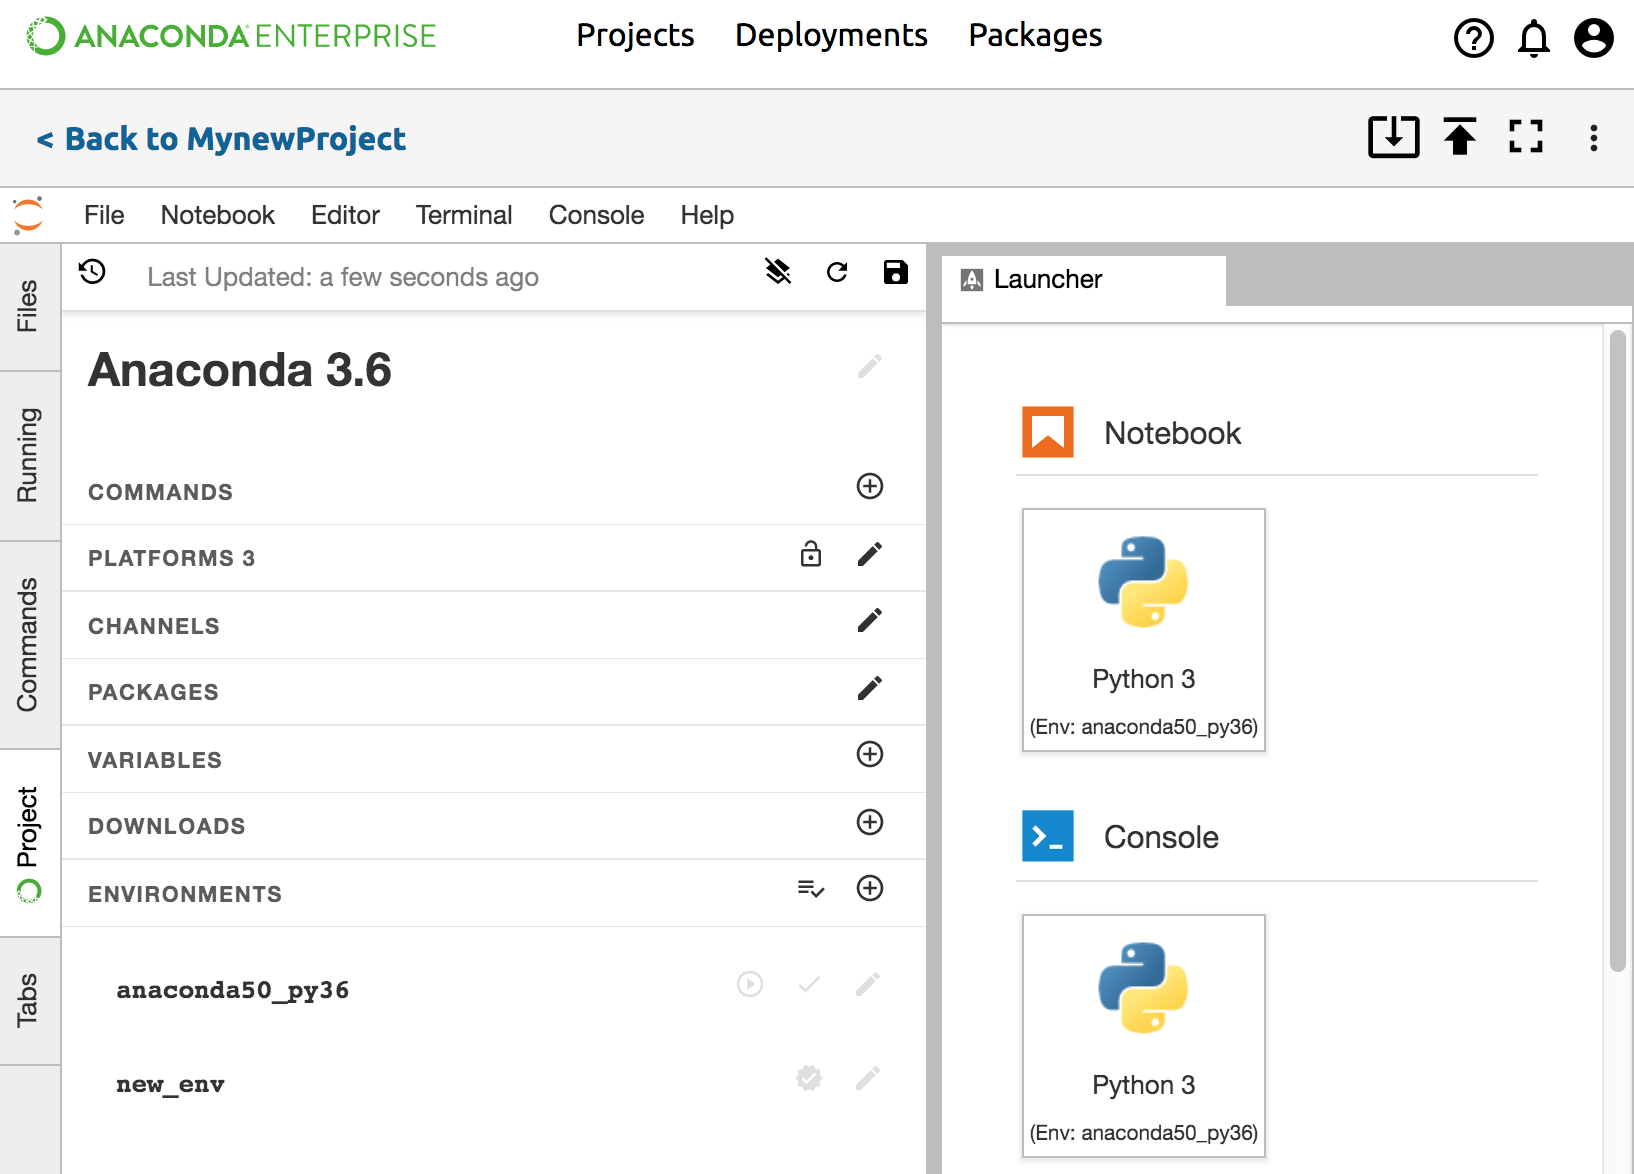
Once the new environment has been saved, you will see new options appear in your launcher window. You will see a new terminal launcher with the new environemnt.
If you have the notebook package in the environment you will also see new notebook launchers as shown below.
Editing an existing environment
Click the “Edit” pencil icon to change the environment name, view supported platforms, add or remove channels, or add or remove packages.
Click Save at the bottom of Environment section to save changes.
Confirm that the package has been added to your
anaconda-project.yml.TIP: If
anaconda-project.ymlis already open, close and reopen it to see changes.
In Jupyter Classic or using the CLI
If you prefer to work at the command line interface (CLI), or are working in Jupyter Classic,
open a terminal and run the command anaconda-project add-env-spec --name followed by the
environment name. You can add and remove packages or channels from an existing environment using
anaconda-project add-packages --env-spec followed by the environment name and any packages.
EXAMPLE: To create an environment called new_env with notebook, pandas and bokeh:
anaconda-project add-env-spec --name new_env
anaconda-project add-packages --env_spec new_env notebook pandas bokeh=0.12
TIP: For more CLI commands type anaconda-project --help.