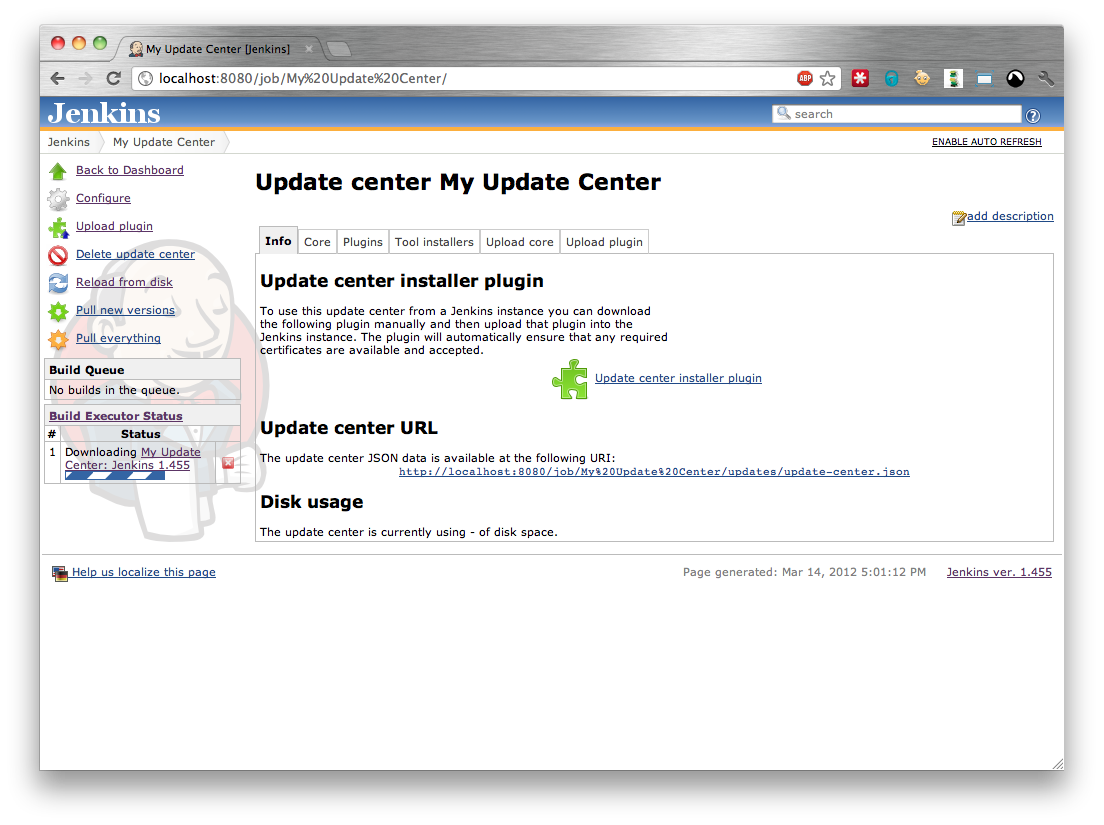
The main update center screen consists of a number of tabs.
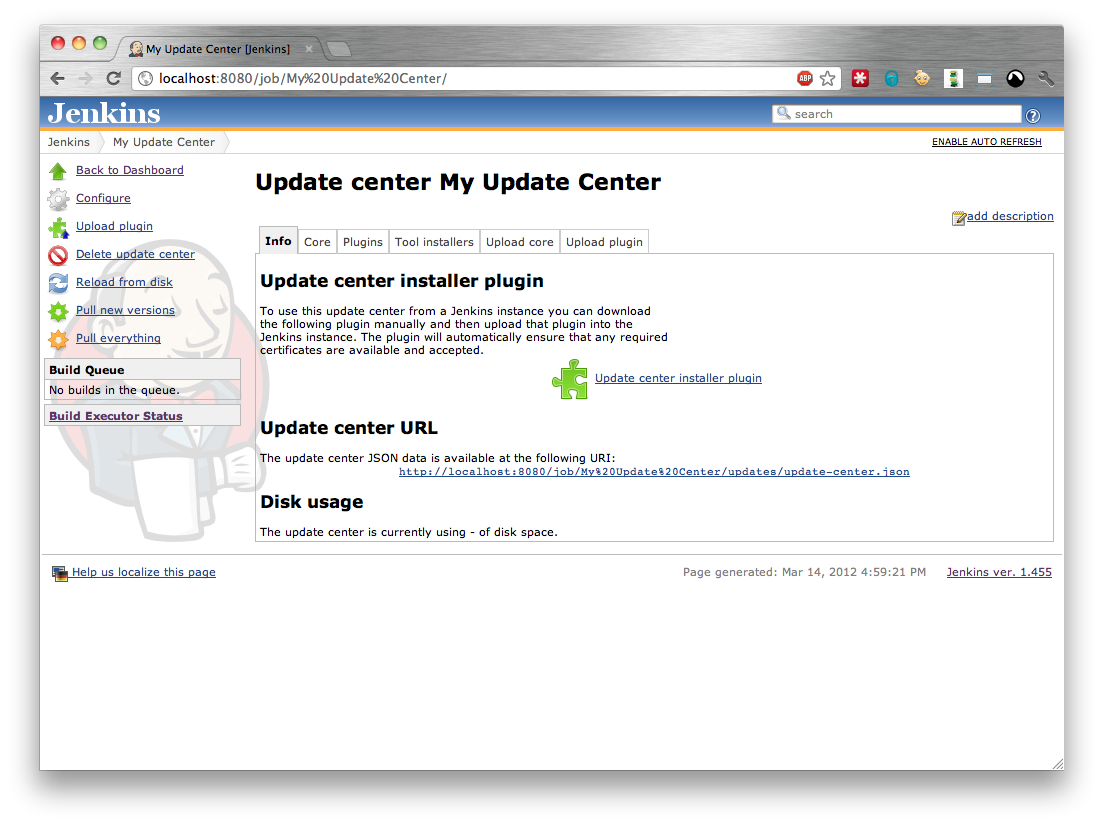
This screen displays some basic information about the update center:
- How much disk space is being used by the update center
- What the update center’s URL is
But most important of all, this screen gives a download link to a plugin that will configure a Jenkins instance to use this update center as an update center.
Important
The plugin that the link downloads will access the update center via the URL that the link corresponds to. Thus it is best to access the link from the machine that the plugin will be installed on in order to ensure that the correct (from that machine) URL for accessing the update center is used.
Note
The plugin that the link downloads will ensure that the matching certificate checks are performed, i.e. if the Update Center is using a Self-Signed Certificate to sign the update-center.json file, the plugin will include the corresponding certificate chain in order to ensure the `update-center.json’s authenticity.
Similarly, if the Update Center is not using any Certificates to sign the update-center.json then the plugin will instruct Jenkins not to require a signed update-center.json for that specific update center, irrespective of the Jenkins instance’s global certificate requirements.
There are two ways to install the plugin in a Jenkins instance:
Using the Web Interface
- From the Update Center, download the Update center installer plugin. (Ideally downloading it via a browser running on the same machine as the Jenkins instance that will be using the Update Center as its update center)
- Go to the Jenkins instance’s root page.
- If the Jenkins instance has security enabled, login as a user with has the Overall | Administerpermission.
- Select the Manage Jenkins link on the left-hand side of the screen.
- Select the Manage Plugins link.
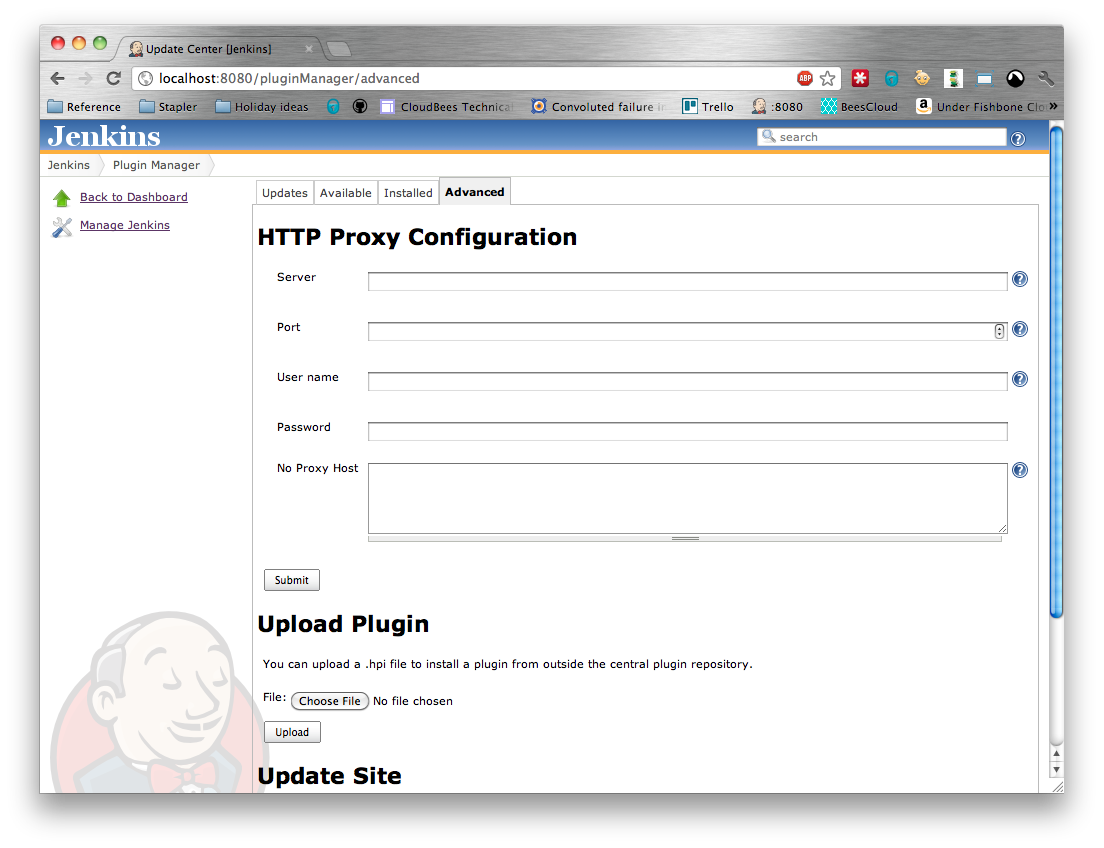
On the Advanced tab use the Upload Plugin option to upload the plugin.
Check the Installed tab. If the Jenkins instance says that it requires a restart, then restart the Jenkins instance.
Note
Up to at least Jenkins 1.455 require a restart to activate the plugin.
Using the Command Line Interface
- From the Update Center, download the Update center installer plugin. (Ideally you should download it via a browser running on the same machine as the Jenkins instance that will be using the Update Center as its update center.)
- Stop the Jenkins instance.
- Move (or copy) the downloaded plugin into the
$JENKINS_HOME/plugins/directory - Start the Jenkins instance.
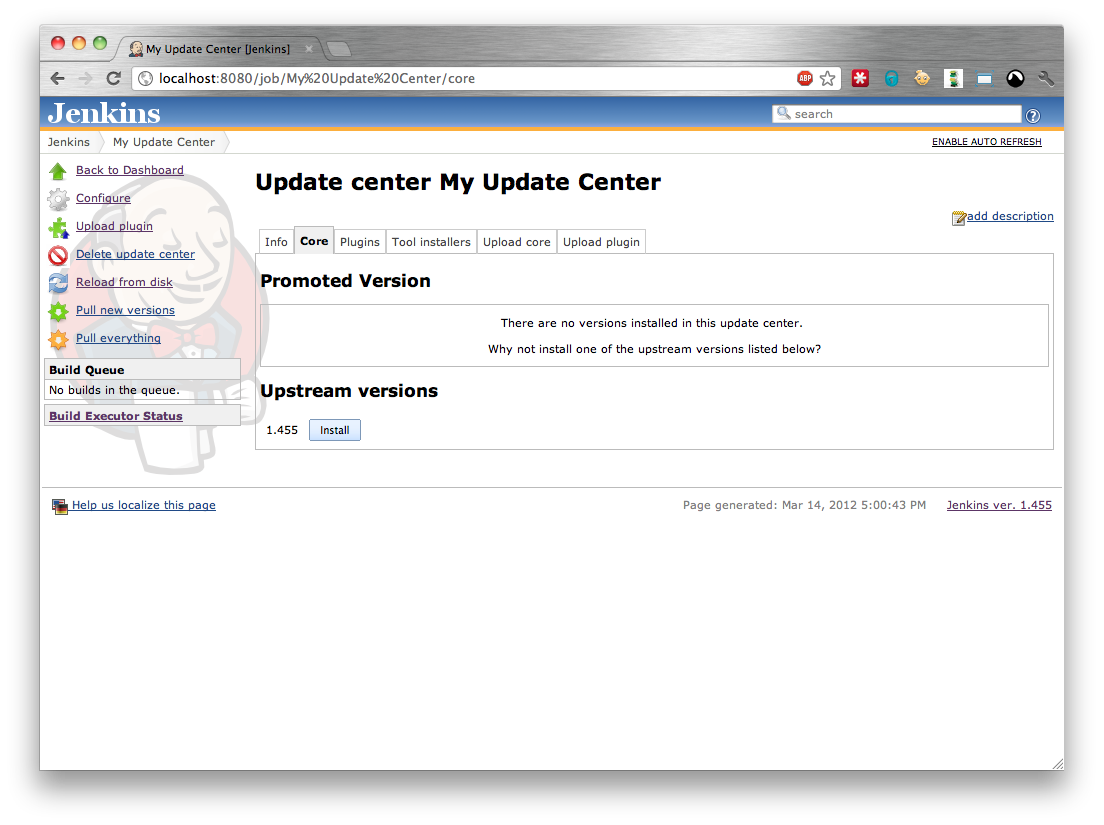
This screen provides details of Jenkins distributions.
The Promoted Version section lists all the versions of Jenkins that are installed in the update center and allows for one specific version to be advertised via the Update Center’s update-center.json
The Upstream Versions section lists any versions of Jenkins, coming from the Update Center’s upstream sources, that have not been installed in the Update Center
Note
Only versions of Jenkins which have been installed in the update center can be advertised via the Update Center’s update-center.json. This is to ensure that the Update Center can continue to serve even if the upstream source is off-line.
To install a version of Jenkins from the upstream sources, just click on the corresponding Install button and the download will be added to the download queue.
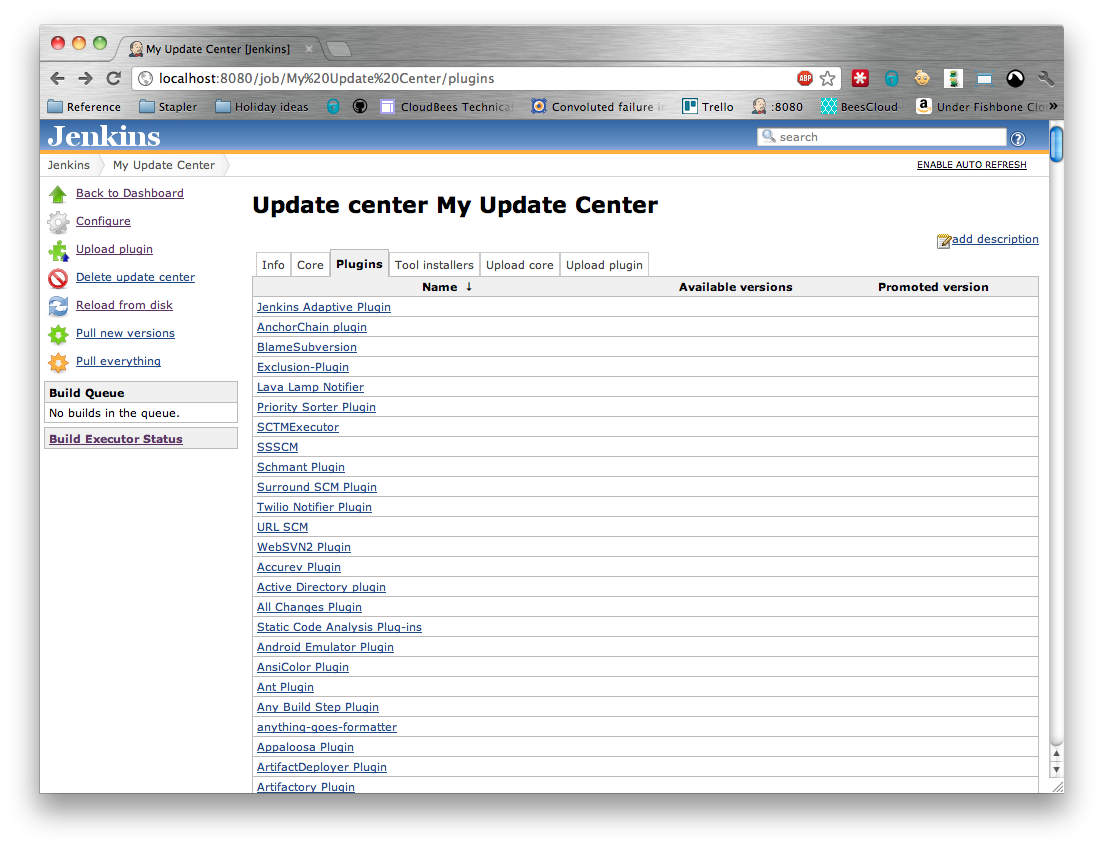
This screen provides details of all the Plugins known to this Update Center, i.e. all the plugins advertised by the update center’s upstream sources as well as all the plugins installed in the update center.
Clicking on a Plugin’s name will display the Plugin information screen
Figure 15.8. The plugins details screen when no version of a plugin is installed in the update center
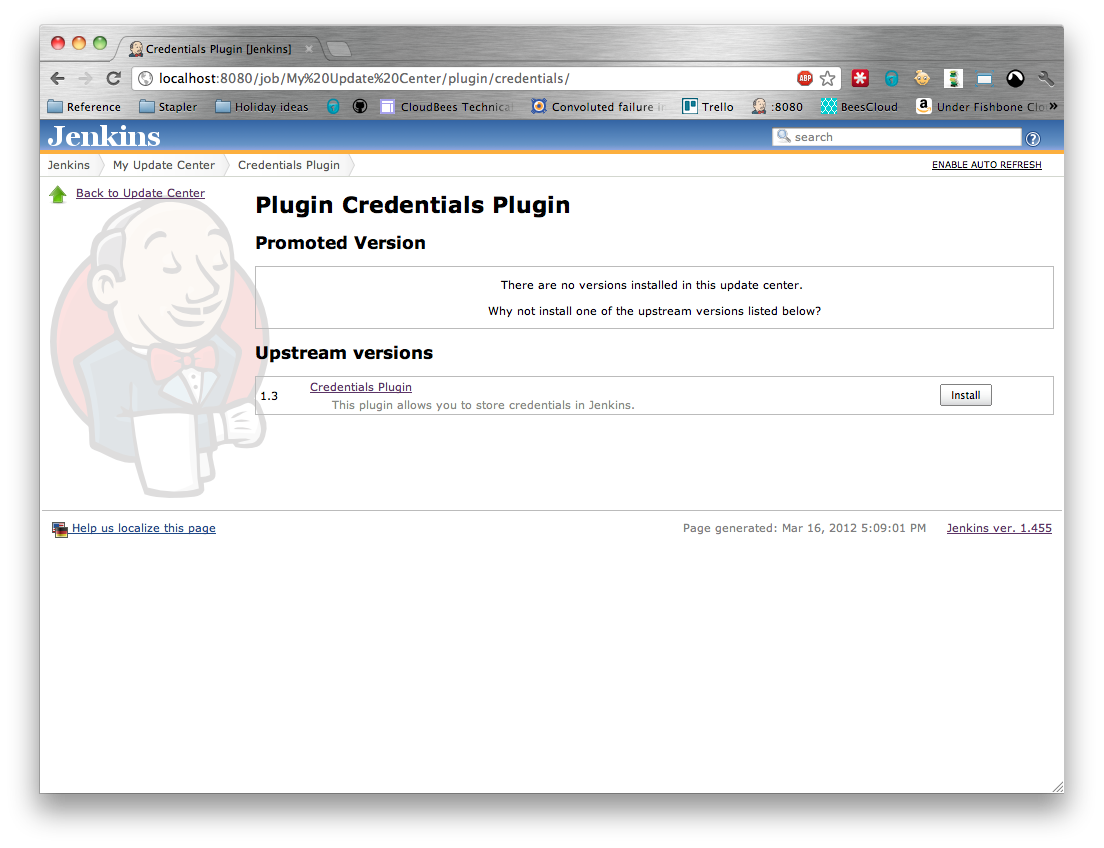 |
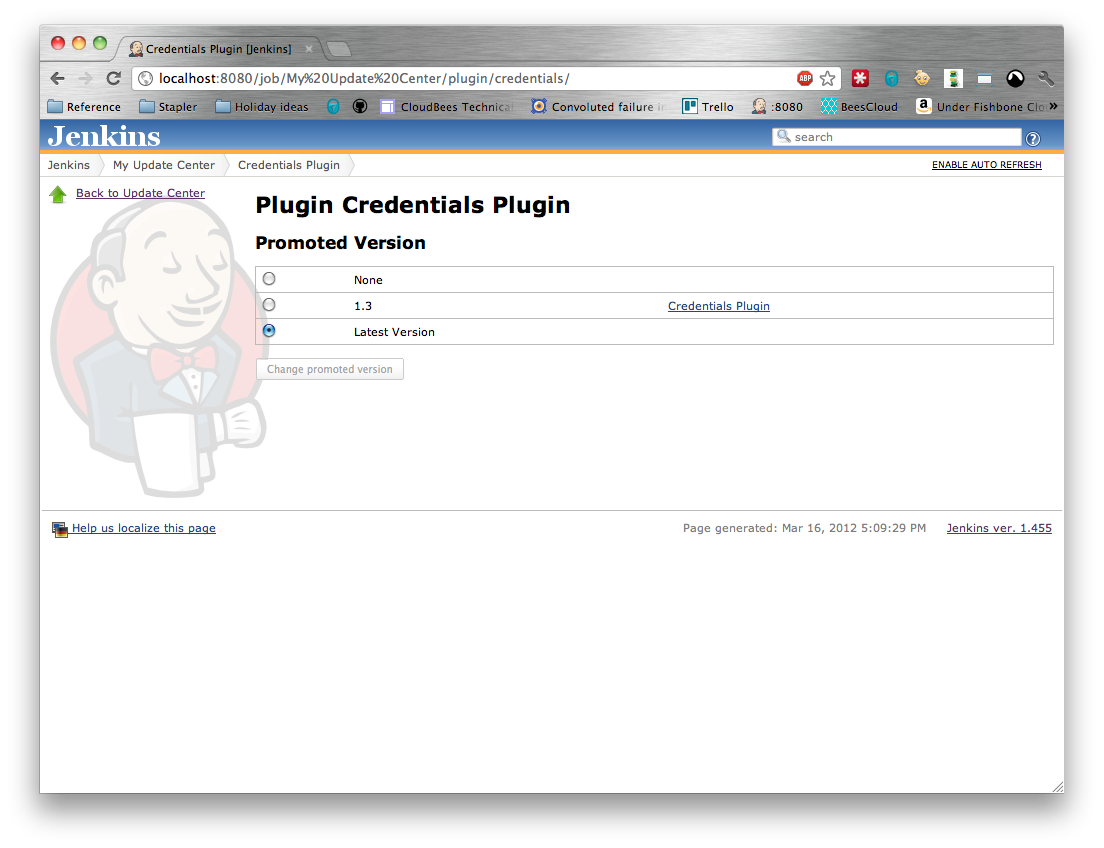
The Promoted Version section lists all the versions of the plugin that are installed in the update center and allows for one specific version to be advertised via the Update Center’s update-center.json
The Upstream Versions section lists any versions of the plugin, coming from the Update Center’s upstream sources, that have not been installed in the Update Center
Note
Only versions of plugins which have been installed in the update center can be advertised via the Update Center’s update-center.json. This is to ensure that the Update Center can continue to serve even if the upstream source is off-line.
To install a version of a plugin from the upstream sources, just click on the corresponding Install button and the download will be added to the download queue.

This screen provides details of all the Tool installers known to this Update Center, i.e. all the tool installers advertised by the update center’s upstream sources.
Clicking on a Tool installer’s name will display the list of versions of the Tool installer that are available.
The Update Center plugin does not currently support hosting private versions of Tool installers.

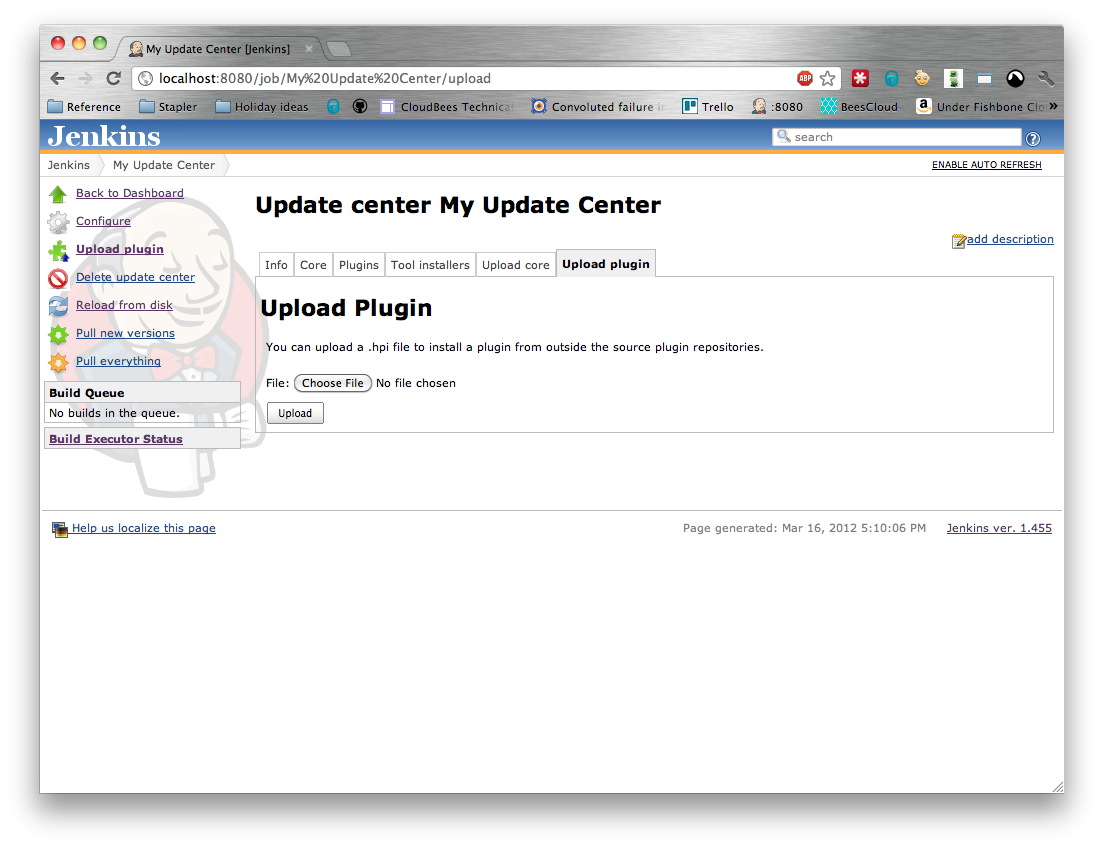
This screen provides for manual uploading of custom distributions of Jenkins into the update center.