Core Jenkins functionality does not provide any mechanism to prevent somebody who can configure a build from assigning that build to a slave. This can be a concern when specific slaves contain secrets that are not for general consumption.
Consider the case of a Jenkins instance shared by both an Operations group and multiple Developer Groups. The operations group have specific credentials that are required in order to deploy the company website into production, so the operations group create a dedicated slave specifically for deploying the company website into production and store the required credentials directly on that slave. The slave is configured to only accept jobs that are tied to the specific slave. However there is nothing stopping a developer from configuring a job they control to run on the operations slave and copy off the credentials.
The Controlled Slaves functionality added by the Folders Plus plugin provides the required restrictions to prevent the above concern.
Note
The controlled slaves functionality is designed to allow the management of controlled slaves in a situation where the person responsible for the slave does not have permissions to configure the folder that will be approved to use the slave and that the person responsible for the folder does not have permissions to configure the slave.
Future versions of this plugin may provide a simplified workflow for the case where the person setting up the controlled slave has the configure permissions on both the slave and the folder.
The first step is to configure the slave to only accept jobs from within approved folders.
Note
Once a slave is configured to only accept jobs from within approved folders it will refuse to build jobs in the root of Jenkins.
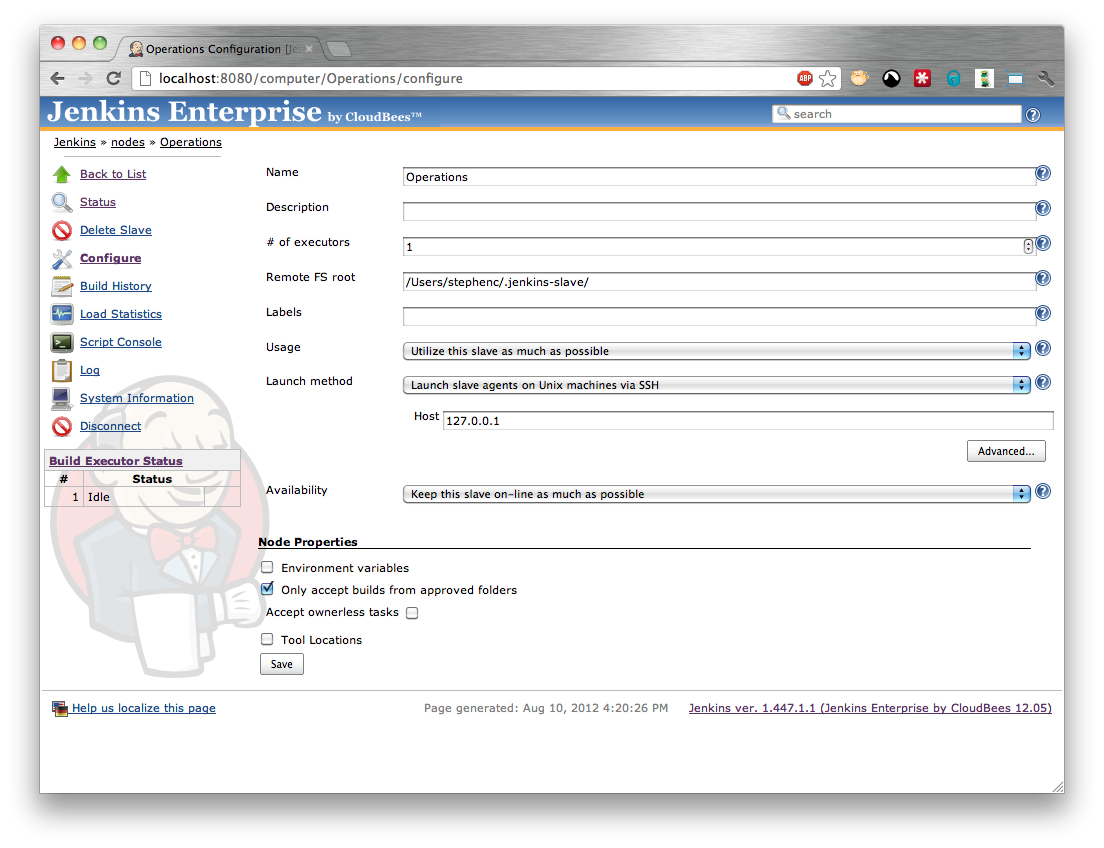
Open the configure screen of the slave (Figure 5.1, “Enabling approved folders functionality on a slave”) and select the Only accept builds from approved folders option.
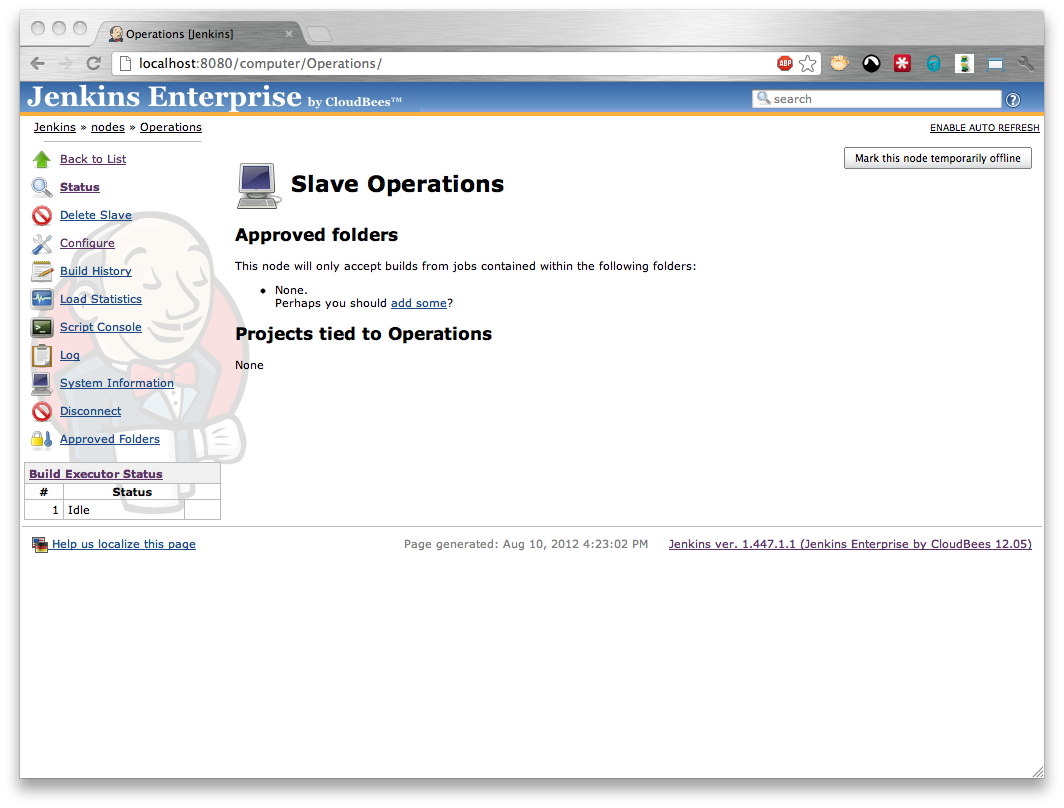
After saving the configuration you should see a screen like that in Figure 5.2, “A slave with approved folders functionality enabled and no approved folders assigned”
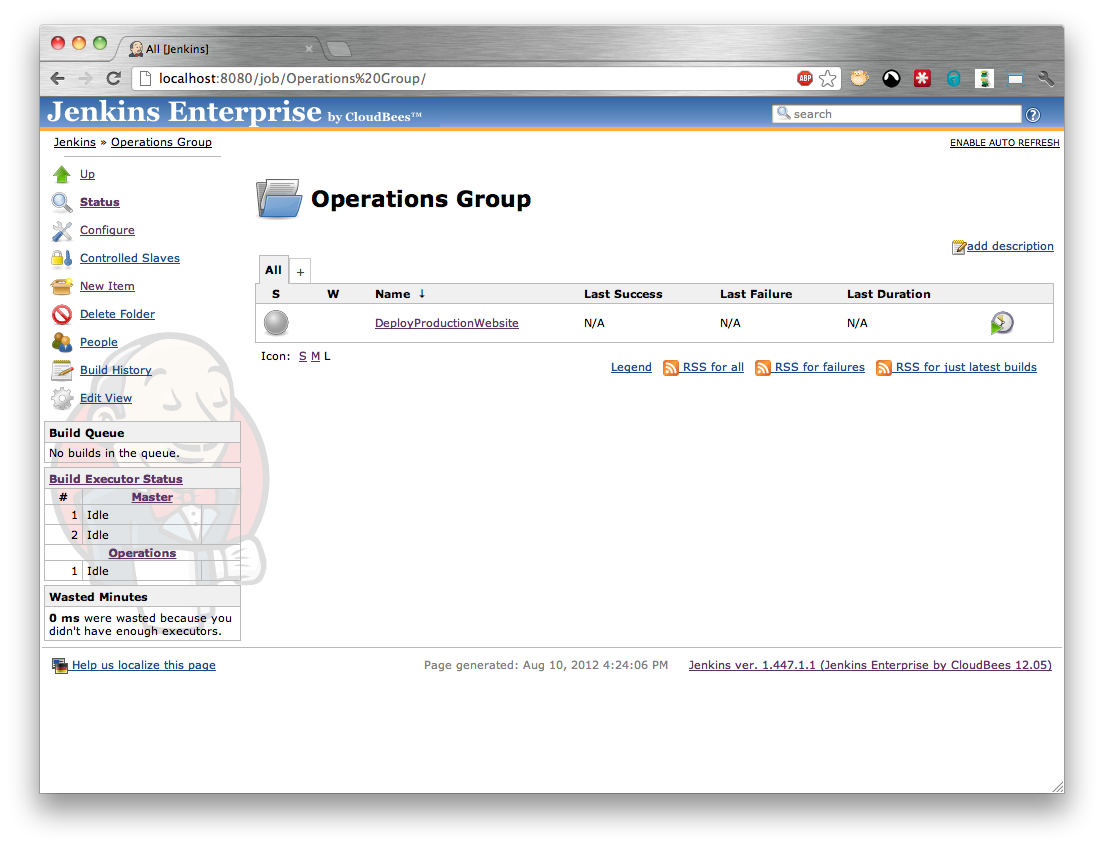
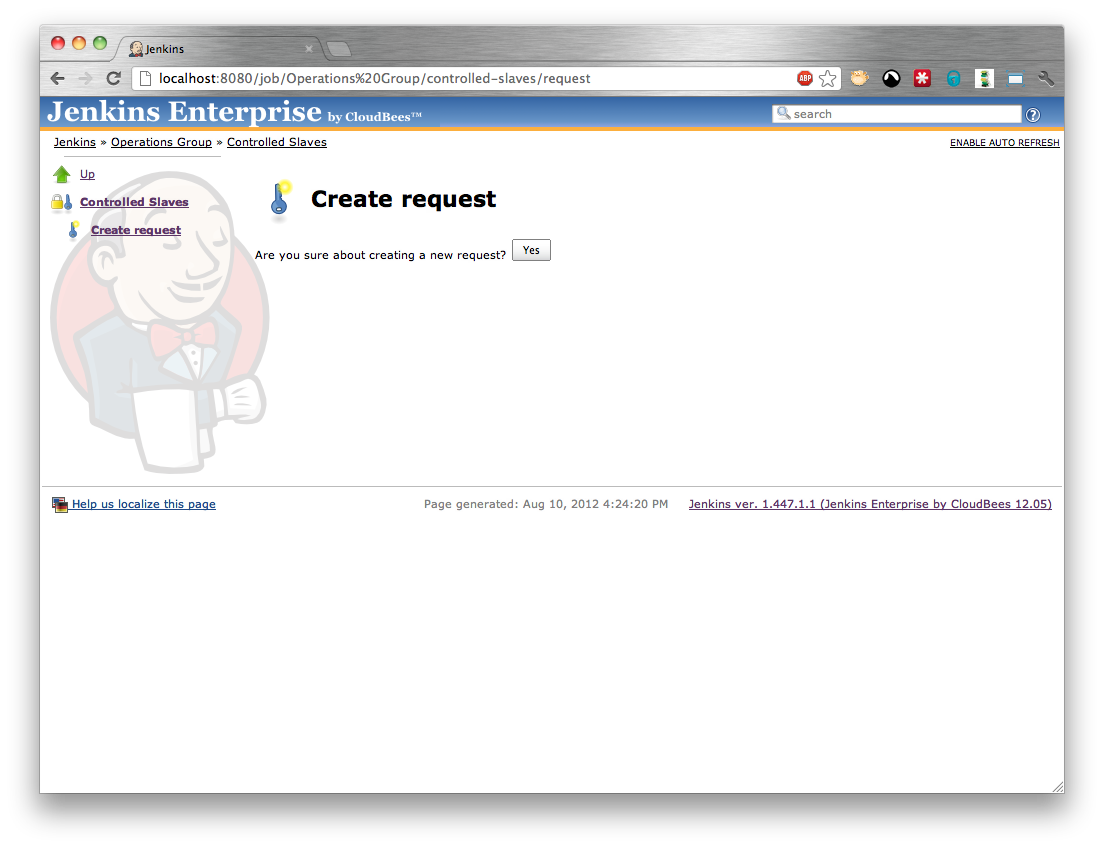
At this point the person with permissions to configure the folder needs to create a request for a controlled slave. They need to open the folder in Jenkins (Figure 5.3, “Creating a controlled slave request - step 1”) and select the Controlled Slaves action.
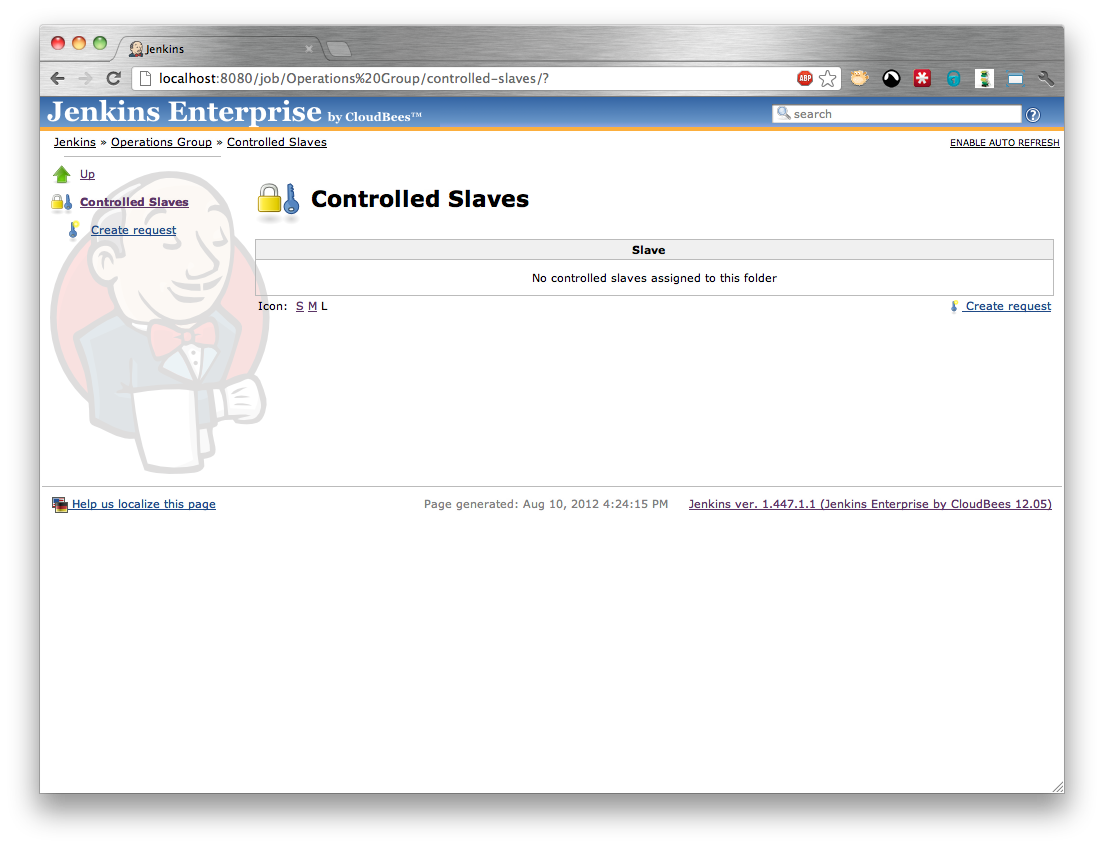
This will display the list of controlled slaves assigned to the folder (Figure 5.4, “Creating a controlled slave request - step 2”). We want to add a new controlled slave so select the Create request action. Confirm the request creation (Figure 5.5, “Creating a controlled slave request - step 3”) and the Request Key should be generated and displayed (Figure 5.6, “Creating a controlled slave request - step 4”). The request key needs to be given to the person with permissions to configure the controlled slave.

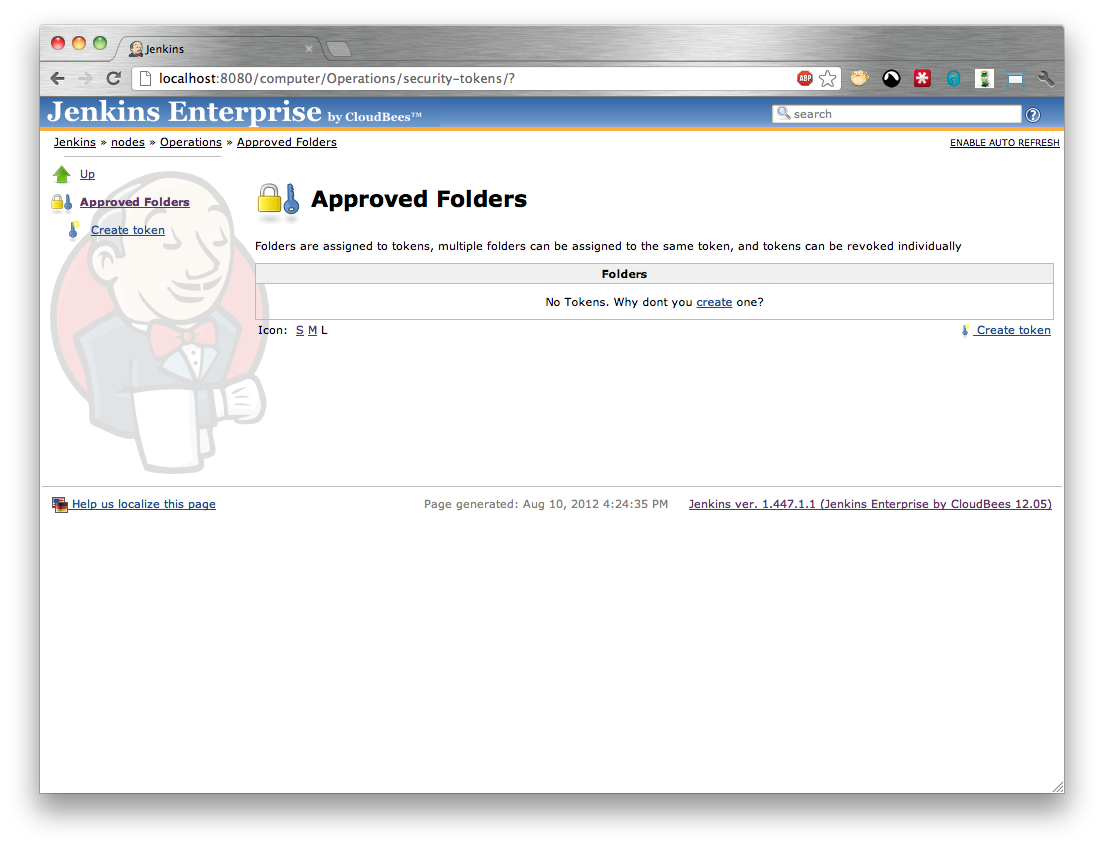
At this point the person with permissions to configure the slave needs to approve the request. They need to select the Approved Folders action from the slave (Figure 5.7, “A slave’s approved folders screen”) and select the Controlled Slaves action.
Note
The Approved Folders screen allows for multiple tokens to be issued, a token can be used to sign multiple requests, and it is left up to the administrator of the slave to decide whether they want to create a new token or use an existing token.
Creating a new token for each slave has the advantage that each approved folder can be revoked individually. Conversely, re-using an existing token allows for bulk revoking of folders.
If there are no existing tokens for approving controlled slave requests you will need to create a new token by selecting the Create token action and confirming the creation (Figure 5.8, “Creating a token for approving requests”) otherwise the authorize button on any existing token can be used to authorize a request using that token. Either route should display the Authorize Request screen (Figure 5.9, “Approving a controlled slave request”).

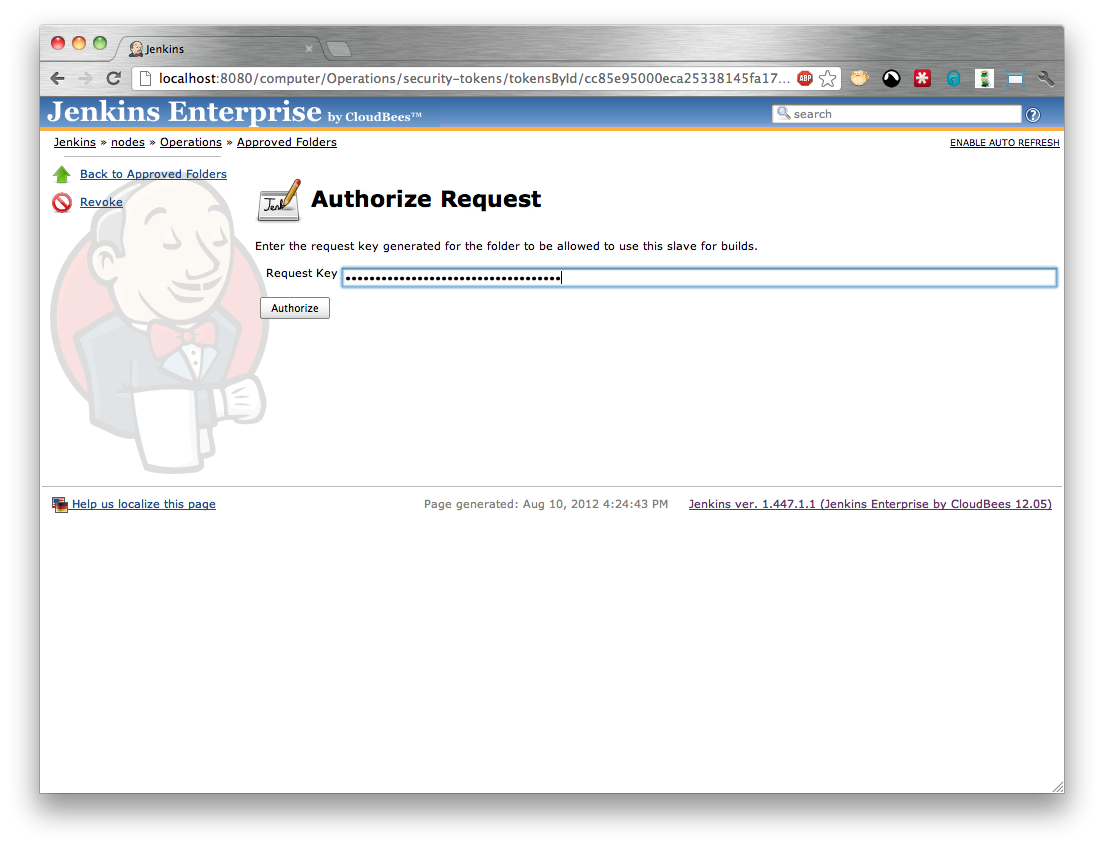
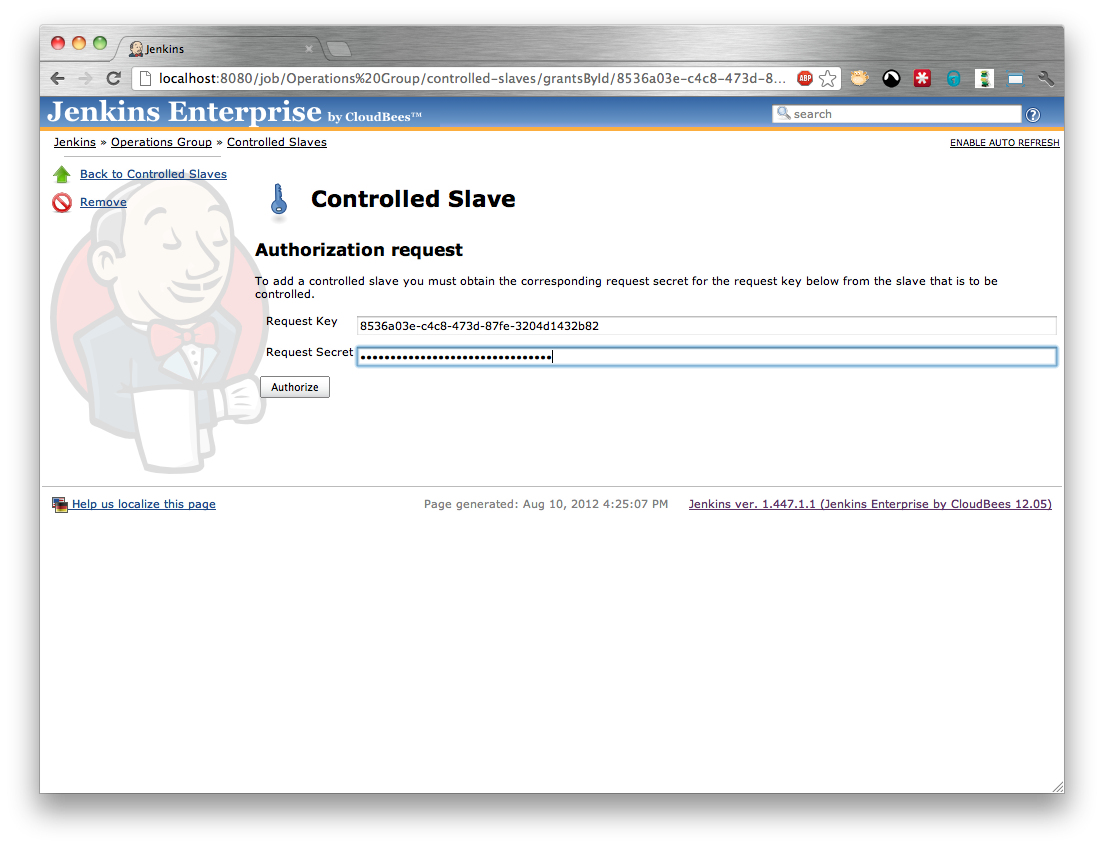
Enter the Request Key and press the Authorize button. The Request Secret should be generated and displayed (Figure 5.10, “An approved request for a controlled slave”). The request key needs to be given to the person with permissions to configure the folder.
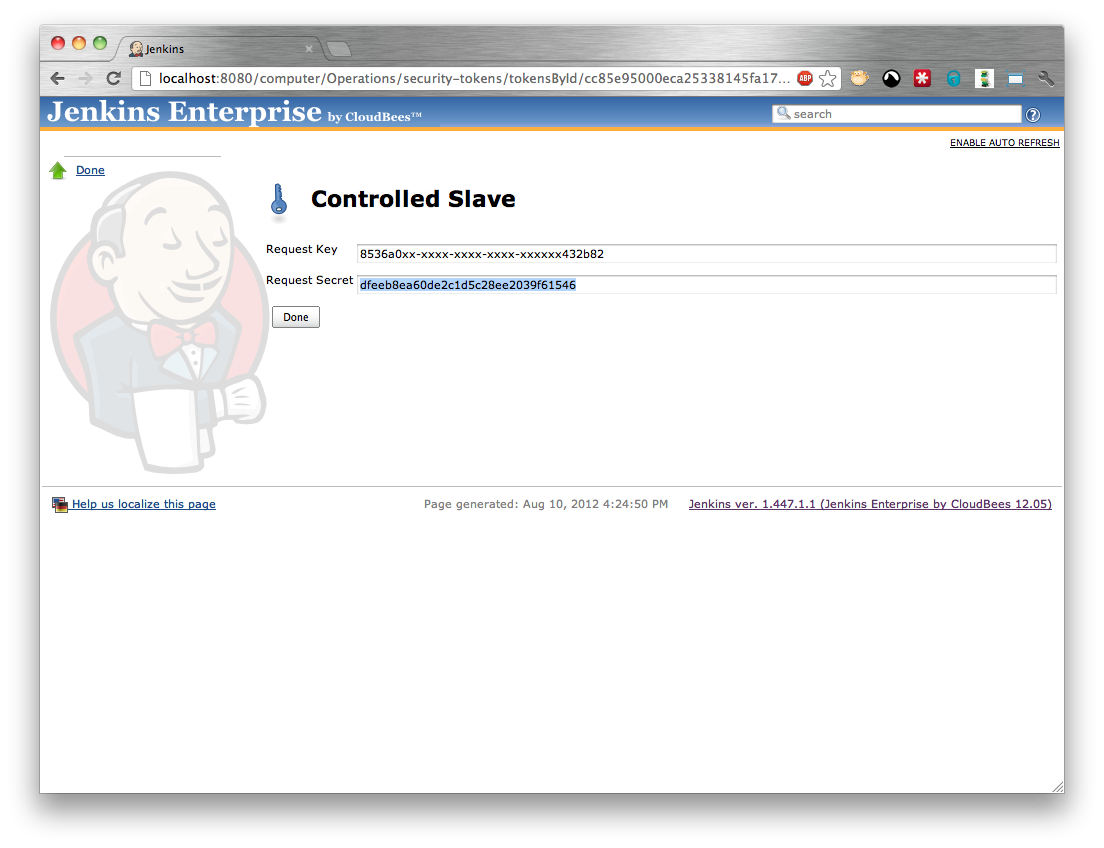
At this point the person with permissions to configure the folder needs to return to the request screen and enter the Request Secret provided by the person responsible for configuring the slave. (Figure 5.11, “Completing a controlled slave request”) and click the Authorize button.
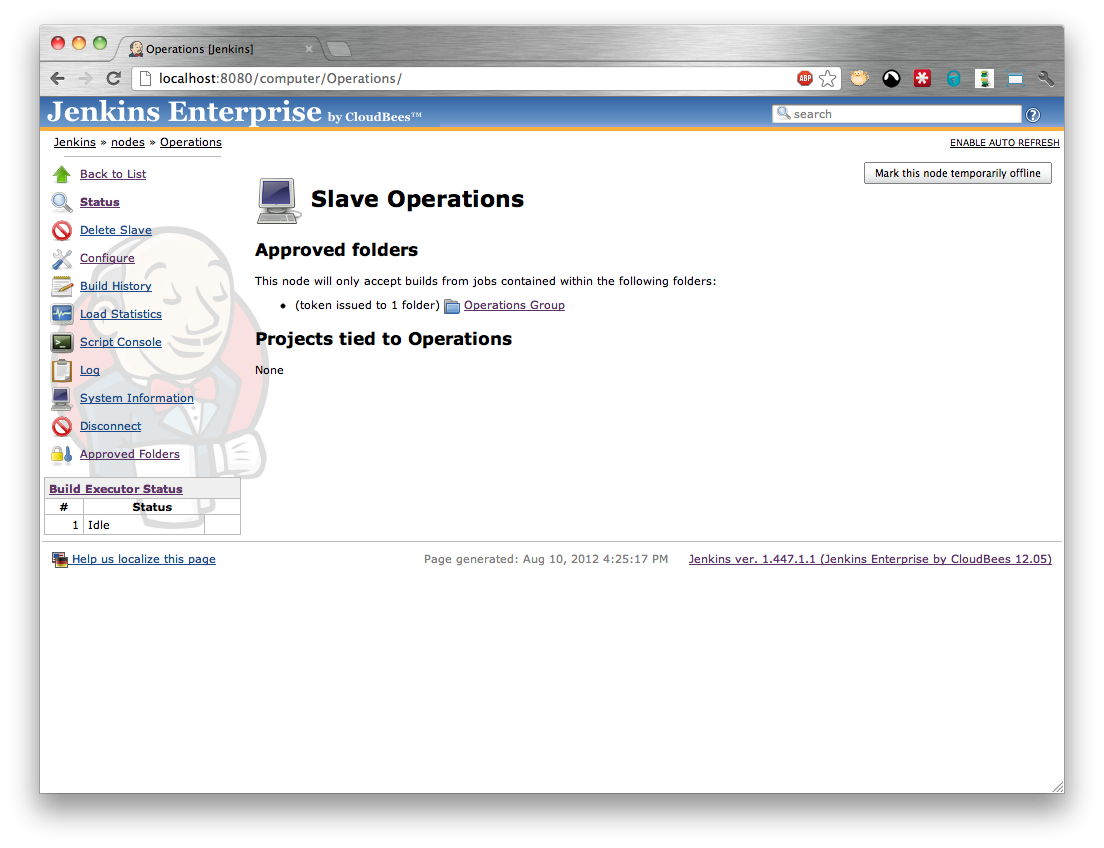
Once the controlled slave request has been completed, the controlled slave should appear in the list of slaves (Figure 5.12, “A folder with an approved slave”) and the folder should appear on the slave (Figure 5.13, “A slave with an approved folder”)
Note
If the person viewing the slave does not have permissions to view the folder, they will not see the folder name when viewing the slave’s status screen or list of approved folders. In this case an additional indicator will be provided detailing the number of “hidden” folders in addition to those that the user is permitted to see.

In order to enforce that only jobs belonging to approved folders can be built on a controlled slave it is necessary to identify the job that owns any build submitted to the build queue of Jenkins. Once the job has been identified, the folder hierarchy can be traversed to see if any parent folder is on the list of approved folders.
Once of the extension points that Jenkins provides is the ability to define custom build types that can be submitted to the build queue. When a plugin author is developing such a plugin, they should ensure that the owning build type hierarchy eventually resolves to the build job to which the task belongs whenever a custom build type is associated with a build job.
In the event that a third-party plugin author has not correctly ensured that their custom build type is correctly associated with its originating job, the controlled slaves functionality will be unable to identify the originating job, and consequently will refuse to let the job build on the controlled slave.
If it is critical to enable the third-party plugin to build on the slave, an the risk of allowing other custom build types to run on the controlled slave, there is an advanced option that can be enabled on a per-slave basis.
There are multiple reasons why Jenkins can block a build from executing. The controlled slave functionality adds an additional reason, however, it should be noted that when Jenkins evaluates a job for building, once it has identified a reason why the job cannot be started, it does not evaluate any of the other reasons. Therefore when Jenkins reports the reason as to why the build is blocked, it will only report the first reason it encountered. In such cases, the user may not realize that the reason for the build being blocked is because it is not within an approved folder.
Jenkins does not re-evaluate whether builds are still blocked until an event causes a probability of jobs being executed. Such events include, but are not limited to
- A job being added to the build queue
- A job being removed from the build queue
- A job completing execution
- A node coming on-line
- A node going off-line
If a job is submitted to the build queue and is blocked because it is not in an approved folder, it will not be re-considered for execution until one of the re-evaluation triggers occurs. Therefore, even if the folder containing the job is added to the list of approved folders, existing blocked builds will not become unblocked until a queue re-evaluation trigger is fired.