
Now your cloudpipe instance is running, you can use your favorite OpenVPN client in order to access your instances within their private network cloudpipe is connected to. In these sections we will present both ways of using cloudpipe, the first using a configuration file for clients without interfaces, and for clients using an interface.
Connect to your cloudpipe instance without an interface (CLI)
Generate your certificates
Start by generating a private key and a certificate for your project:
$ nova x509-create-cert
Create the openvpn configuration file
The following template, which can be found under
nova/cloudpipe/client.ovpn.templatecontains the necessary instructions for establishing a connection :# NOVA user connection # Edit the following lines to point to your cert files: cert /path/to/the/cert/file key /path/to/the/key/file ca cacert.pem client dev tap proto udp remote $cloudpipe-public-ip $cloudpipe-port resolv-retry infinite nobind # Downgrade privileges after initialization (non-Windows only) user nobody group nogroup comp-lzo # Set log file verbosity. verb 2 keepalive 10 120 ping-timer-rem persist-tun persist-key
Update the file accordingly. In order to get the public IP and port of your cloudpipe instance, you can run the following command :
$ nova cloudpipe-list
+----------------------------------+------------+-------------+---------------+
|            Project Id            | Public IP  | Public Port |  Internal IP  |
+----------------------------------+------------+-------------+---------------+
| d1f5d27ccf594cdbb034c8a4123494e9 | 172.17.1.3 | 1000        | 192.168.22.34 |
+----------------------------------+------------+-------------+---------------+
Start your OpenVPN client
Depending on the client you are using, make sure to save the configuration file under the directory it should be, so the certificate file and the private key. Usually, the file is saved under
/etc/openvpn/clientconf/client.conf
Connect to your cloudpipe instance using an interface
Download an OpenVPN client
In order to connect to the project's network, you will need an OpenVPN client for your computer. Here are several clients
For Ubuntu :
kvpnc (For Kubuntu)
For Mac OsX :
For Windows :
Configure your client
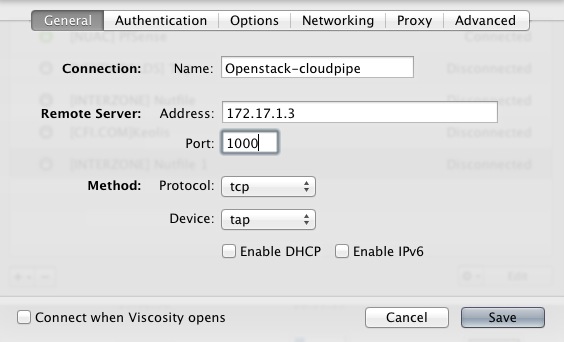
In this example we will use Viscosity, but the same settings apply to any client. Start by filling the public ip and the public port of the cloudpipe instance.
These informations can be found by running a
$ nova cloudpipe-list
+----------------------------------+------------+-------------+---------------+
|            Project Id            | Public IP  | Public Port |  Internal IP  |
+----------------------------------+------------+-------------+---------------+
| d1f5d27ccf594cdbb034c8a4123494e9 | 172.17.1.3 | 1000        | 192.168.22.34 |
+----------------------------------+------------+-------------+---------------+
Figure 10.9. Configuring Viscosity
Connection Name : "Openstack-cloudpipe"
Remote server : "172.17.1.3"
Port : "1000"
Protocol : "udp"
Device Type : "tap"
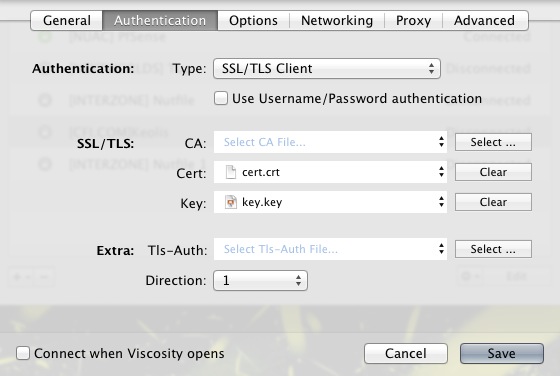
Certificate : The generated certificate
Key : The private key
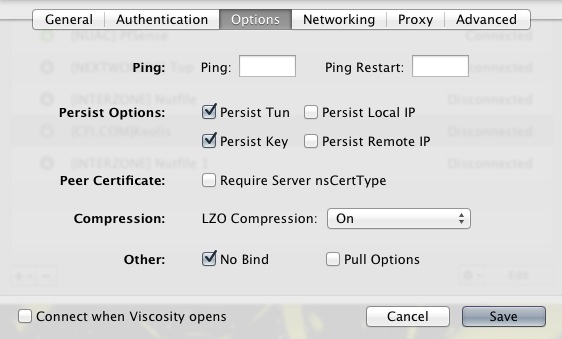
Persistence options : "Persistent TUN" and "Persistent key"
Other :" No bind"
Advanced
Extra settings : "nobind" and "resolv-retry infinite"
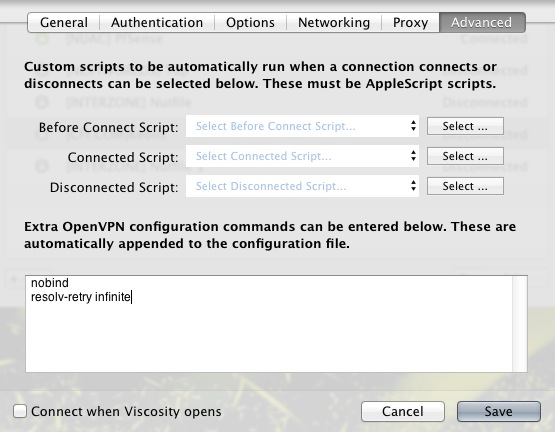
You can now save the configuration and establish the connection!
